Saturday, January 11, 2014

Just a little pouch

I have been so busy organising to move so I have just done a bit of sewing to try to relax. Nothing final on the sale yet but it all looks good.
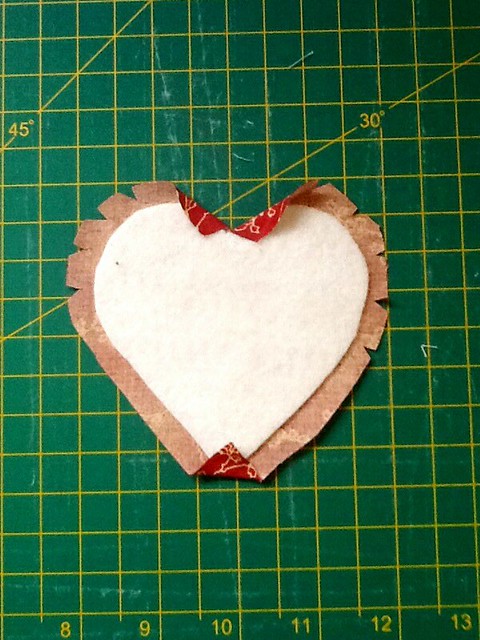
When I found the little heart needle book there was a cute pouch on the same blog.
It was easy to make but even though I concentrated really hard when I put the binding on I still got the seam on the front of the pouch. I used regular double fold bias for this one. Since I burned myself out embellishing the heart needle book I decided to find a fancy closure for the pouch. I bought several flashy hooks and eyes and clasps when in America. I chose the giant hook and eye.


I expect to do a few more posts before going offline to move ( I am expecting to move) but after that I have my trip to Sydney with my mum so I will be pretty quiet for February. I am trying to keep up with the goals I set for Something old Something new but I doubt I will get to the something new this month. I also discovered the Christmas decoration sew a long so have to get a couple of felt cuties made in the next few days. Check it out.


Other comment options:
Flickr
Pinterest

Happy Quilting and Crafting,
Val

Sunday, January 5, 2014

A little Heart Needle Book

I was surfing through Pinterest and the sites they lead to and came across a cute little heart needle book. I could see some potential for using applique paper and stiff bag interfacing to make the process suit me.
So, instead of cardboard for the covers I traced my heart onto freezer paper then ironed it onto the piece of stiff handbag interfacing I had on my sewing table. I cut it out then reused the freezer paper to make a second one. I wanted to fuse the fabric to these pieces so I cut out two squares of fusible applique paper and ironed them to the wrong side of my cover fabric then cut around them.

Using my teflon mat (it is actually a non stick teflon sheet meant for the frying pan) I ironed the square of fabric on top of the heart shaped interfacing. I peeled it off the teflon mat and trimmed around it to leave a 1/4 inch allowance to turn in.  I clipped and turned the allowance under. This part wasn't quite as tricky as I thought it might be. I did burn my fingers twice but I didn't get any glue on the iron. It sticks in place beautifully and makes sewing the lining and cover together easy.


I am a machine sewer rather than a hand sewer but it would be possible to make the cover using buttonhole stitch. I also struggle to tizzy things up. I love to look at all the beautiful embroidery and embellishments others use on their projects but can't quite get it all to come together. What I managed on the front of this needle book is about as good as it gets in my craft room but it does lend itself to a nice stitchery on the front or more buttons and beads or applique.

When I cut out the felt hearts I just reused the freezer paper heart two more times. I then trimmed it down to make the two inside hearts. I used the one piece 6 times. I am so glad I discovered freezer paper. When I did I bought a whole role of it. It will probably last me the rest of my life.

Now I have a little needle book to mind a needle when I bring one down to stitch something like a button and it won't get lost in the lounge. The one on Pinterest had a ribbon to tie on the right hand side but I am not much a tying ribbons on needle books.


I know what a pain it is to find just what you need in your carefully filed patterns or 'just draw a heart shape' so I have included the half heart image the same size as I used. Draw a line and trace half onto your freezer paper. Fold on the line and cut out along the half heart line so it ends up symmetrical. Heart shape PDF.

I have put together a few basic photos and instructions in a flickr set. You can look at it here.
If you pin one of the last two pictures  from this blog you can always find it later or you can go to the photo set and pin that. Hover the mouse over the image to see the pin button.

Comment options
Flickr
Pinterest

Happy Quilting and Crafting,
Val

Saturday, January 4, 2014

Scrappy Star

So far I have completed two things on my list for January. I have posted and started work on my Something old and Something new link up that I have joined over at Never to Hot to Stitch. I linked up with my quilt diary blog for the Go Wild Garden quilt that I want to get finished this year. Check it out. I feel so organised :) Then again it is only Jan 4.

The second thing I have done is make my first scrappy star for the link up at Majas Paradis . Thankfully she has included a translator widget.


I really want to use up my scraps but even a small scrappy wonky star is hard to make with really small pieces. I have a stack of what must be fabric sample pieces about 1 1/2 inches square that I will use to make 3 1/2 inch squares for centres. They are all uneven. I have tried making them into squares to start with a while back but that is way to hard. This time I just joined them together then trimmed the finished 9 patch.

I love stars so I am pretty sure I will be able to make at least one a month. I may try different shaped stars along the way and I don't think I will worry too much about the block size. Just whatever turns out and then I will fit them together somehow. I want to make a small quilt out of them.

I have started collecting buttons down my right sidebar for things I want to work on this year. There are lots of great things out there already. If you have found a good one please let me know. I think I could fit a couple more in :D

Comment options:
Flickr
Pinterest

Happy Quilting and Crafting,
Val

Thursday, January 2, 2014

Do I cut up the tea towels? Yes!


My DD1 gave me some Christmas presents wrapped in gorgeous matching tea towels from Target. One was red and white check, one was red with white spots and one was white with a red line design and the fancy rick rack border.
My tea towel hangs on the back of the pantry door so it doesn't really get seen much so I decided to cut them up and make three sets of matching placemats or tray mats, coasters, napkins and mug rugs.
This is the basic layout. I allowed 2 cm extra on the edges that would need hemming. The place mat size was based on the size of my trays. I found in the past that I needed a mat on the trays because the tea pot slipped across the tray if I wasn't careful carrying it. The coasters were in the bottom corner so I could use the already hemmed side.


As a guide:
tray/place mat is 40cm x 28cm
napkin is 29cm x 28cm
coaster is 12cm x 12cm and 14cm x 12cm (one needs three sides hemmed)
mug rug is 28cm x 19cm

The bits left over were just the right size to add a border trim and do some applique. I have enough left over now to put a bit of applique on a white or red tea cosy.

Here are all my lovely sets.

Coasters
Mug Rugs

Napkins

Placemats/ Tray mats

Complete set

Complete set

Tray mat in action
Back in September 2012 I took the plunge and made one of my souvenir tea towels into a tray mat. It is nicer than washing it to death as a tea towel of just having it folded up in the cupboard.


Comment options:
Flickr
Pinterest

Happy Quilting and Crafting,
Val

Related Posts Plugin for WordPress, Blogger...